本文共 8085 字,大约阅读时间需要 26 分钟。
目前的游戏开发中,粒子系统的使用想必是标配了,Unity自然也提供了相应的解决方案:ParticleSystem,网上对ParticleSystem的介绍也非常之多(譬如,,还有),虽然相关的资料教程不少,但多是一些如何使用之类的常规信息,对于一些虽然有些“生冷”,但仍然可能遇到的粒子知识,网上涉及的资源便不多了,本篇就随便讲讲自己遇到的几个ParticleSystem的“冷”知识~
1. 如何在Editor下Playback粒子效果?
Unity本身自带ParticleEditor,正常情况下选中所编辑的粒子即可Playback,但是当我们切换选择到其他GameObject的时候,之前粒子的Playback便停止了,这在某些时候可能会给我们开发带来不便,考虑你基于Unity开发了一个表现预览器,预览器里显示的内容可能包括角色模型,技能特效等等各种内容,如果我们在编辑器中选择了某个GameObject节点,我们的期望自然是在视图中可以看到挂接在该GameObject下的所有显示效果,其中几乎肯定会有粒子特效,如果你简单的尝试调用一下ParticleSystem的Play接口,就会发现在Editor模式下粒子并不会如期的进行Playback……
一个Workaround的方案是仅在UnityEditor的Play模式下才提供粒子的Playback,这在一般情况下是可以接受的,但是算不上一个很好的方案,更好的解决方法还是实现Editor模式下的粒子Playback功能,能办到吗?
其实是可以的,其中的关键是用好接口~
简单看下该接口的API说明:
Fastforwards the particle system by simulating particles over given period of time, then pauses it.
该接口能够模拟粒子快进一段指定时间并停止粒子,Nice,如果我们在Editor下的Update中持续对该接口进行调用,并传递deltaTime作为时间参数,那么粒子便能在Editor下Playback起来了!
简单看下示例代码:
// desc simple particle playback window// maintainer hugoyuusing System;using System.Collections.Generic;using UnityEngine;using UnityEditor;public class ParticlePlaybackWindow : EditorWindow{ // implementation details here // Called multiple times per second on all visible windows. void Update() { if (m_playbackState == PlaybackState.Playing) { if (m_particlePlayback.HaveParticleSystems()) { // simulate particles if (m_lastUpdateTime <= 0) { m_lastUpdateTime = Time.realtimeSinceStartup; } m_particlePlayback.Update(Time.realtimeSinceStartup - m_lastUpdateTime); m_lastUpdateTime = Time.realtimeSinceStartup; // repaint views EditorUtil.RepaintView(); } } } // implementation details here } 其中的核心代码便是这句
m_particlePlayback.Update(Time.realtimeSinceStartup - m_lastUpdateTime);
简单看下ParticlePlayback的实现:
// desc simple particle play back implementation// maintainer hugoyuusing System.Collections.Generic;using System.Collections.ObjectModel;using UnityEngine;using UnityEditor;class ParticlePlayback{ // implementation details here public void Update(float deltaTime) { for (int i = 0; i < m_particleSystems.Count; ++i) { // NOTE need false params here since default params are all true m_particleSystems[i].Simulate(deltaTime, false, false); } } // implementation details here} 2. 粒子可以Scale吗?
对于很早便开始接触Unity的朋友,对于这个问题的回答可能是否定的,至少在运行模式下是否定的,不过这个观点已经过时了,现在我们已经可以很方便的缩放ParticleSystem了,至于如何做,容我细细道来~
Unity5.3版本之前,ParticleSystem并不能很好的受Transform的缩放影响,为了达到Scale的目的,一个方法是根据Scale动态的改变ParticleSystem的各项粒子属性,譬如大小、速度等等,但是由于粒子的不少属性并没有暴露给脚本使用,导致必须使用SerializedObject来进行反射获取,这也进一步导致该方法只能在编辑器环境下使用,网上相关的资料不少也是该方法的不同实现(譬如和),简单列下示例代码:
void ScaleShurikenSystems(float scaleFactor){#if UNITY_EDITOR //get all shuriken systems we need to do scaling on ParticleSystem[] systems = GetComponentsInChildren (); for (int index = 0; index < systems.Length; index++) { ParticleSystem system = systems[index]; system.startSpeed *= scaleFactor; system.startSize *= scaleFactor; system.gravityModifier *= scaleFactor; //some variables cannot be accessed through regular script, we will acces them through a serialized object SerializedObject so = new SerializedObject(system); //unity 4.0 and onwards will already do this one for us#if UNITY_3_5 so.FindProperty("ShapeModule.radius").floatValue *= scaleFactor; so.FindProperty("ShapeModule.boxX").floatValue *= scaleFactor; so.FindProperty("ShapeModule.boxY").floatValue *= scaleFactor; so.FindProperty("ShapeModule.boxZ").floatValue *= scaleFactor;#endif so.FindProperty("VelocityModule.x.scalar").floatValue *= scaleFactor; so.FindProperty("VelocityModule.y.scalar").floatValue *= scaleFactor; so.FindProperty("VelocityModule.z.scalar").floatValue *= scaleFactor; so.FindProperty("ClampVelocityModule.magnitude.scalar").floatValue *= scaleFactor; so.FindProperty("ClampVelocityModule.x.scalar").floatValue *= scaleFactor; so.FindProperty("ClampVelocityModule.y.scalar").floatValue *= scaleFactor; so.FindProperty("ClampVelocityModule.z.scalar").floatValue *= scaleFactor; so.FindProperty("ForceModule.x.scalar").floatValue *= scaleFactor; so.FindProperty("ForceModule.y.scalar").floatValue *= scaleFactor; so.FindProperty("ForceModule.z.scalar").floatValue *= scaleFactor; so.FindProperty("ColorBySpeedModule.range").vector2Value *= scaleFactor; so.FindProperty("SizeBySpeedModule.range").vector2Value *= scaleFactor; so.FindProperty("RotationBySpeedModule.range").vector2Value *= scaleFactor; so.ApplyModifiedProperties(); }#endif} 另外的一种缩放粒子的方式是使用定制的Shader,这种方法便不存在只能在Editor下使用的限制了,但是需要为所有粒子使用到的Shader扩展Scale功能,感觉上也是略有不便,网上也有不少相关的介绍,譬如和,有兴趣的朋友可以细致看看,在此便不列代码了。
Unity5.3之后,ParticleSystem为脚本导出了相关的属性接口,并且很好的支持了Transform的Scale变换,相关的介绍可以看和(还有个小讨论),同样的,我们仍然可以沿用之前改变粒子属性的方法来达到缩放的目的,只是这次我们不再需要SerializedObject了,自然代码也“清新”了许多,上有段示例代码,大概贴一下:
static void ScaleSystem(ParticleSystem particles, float scale, bool scalePosition, ParticleScalerOptions options = null){ if (options == null) { options = defaultOptions; } if (scalePosition) { particles.transform.localPosition *= scale; } particles.startSize *= scale; particles.gravityModifier *= scale; particles.startSpeed *= scale; if (options.shape) { var shape = particles.shape; shape.radius *= scale; shape.box = shape.box * scale; } if (options.velocity) { var vel = particles.velocityOverLifetime; vel.x = ScaleMinMaxCurve(vel.x, scale); vel.y = ScaleMinMaxCurve(vel.y, scale); vel.z = ScaleMinMaxCurve(vel.z, scale); } if (options.clampVelocity) { var clampVel = particles.limitVelocityOverLifetime; clampVel.limitX = ScaleMinMaxCurve(clampVel.limitX, scale); clampVel.limitY = ScaleMinMaxCurve(clampVel.limitY, scale); clampVel.limitZ = ScaleMinMaxCurve(clampVel.limitZ, scale); } if (options.force) { var force = particles.forceOverLifetime; force.x = ScaleMinMaxCurve(force.x, scale); force.y = ScaleMinMaxCurve(force.y, scale); force.z = ScaleMinMaxCurve(force.z, scale); }} 不过个人感觉更简洁的方式,还是使用ParticleSystemScalingMode.Hierarchy,简单设置一下粒子的scalingMode为Hierarchy,之后便可以简单的调整Hierarchy层级的Transform缩放了,如果使用ParticleSystemScalingMode.Local,缩放粒子也并不困难,概念上和Hierarchy也是类似的,大概贴下代码:
static float GetScaleInternal(ParticleSystem particleSystem){ Debug.Assert(particleSystem != null); var localScale = particleSystem.transform.localScale; // NOTE now we assume local scale component values are always same, pay attention Debug.Assert(MathUtil.IsEqual(localScale.x, localScale.y, localScale.z)); return localScale.x;}static void ScaleInternal(ParticleSystem particleSystem, float scale){ Debug.Assert(particleSystem != null); // set scaling mode and adjust local scale and gravity particleSystem.scalingMode = ParticleSystemScalingMode.Local; var oldScale = GetScaleInternal(particleSystem); particleSystem.transform.localScale = Vector3.one * scale; // NOTE now we assume gravityModifier is always sync local scale value, pay attention particleSystem.gravityModifier *= (scale / oldScale);}public static void Scale(ParticleSystem particleSystem, float scale, bool includeChildren){ if (particleSystem != null) { ScaleInternal(particleSystem, scale); if (includeChildren) { var childrenParticleSystems = particleSystem.GetComponentsInChildren (); for (int i = 0; i < childrenParticleSystems.Length; ++i) { if (childrenParticleSystems[i] != particleSystem) { ScaleInternal(childrenParticleSystems[i], scale); } } } }} 至于ParticleSystemScalingMode.Shape,该模式下,Transform的Scale只会影响粒子的Shape大小,并不会影响诸如粒子大小速度之类的其他属性~
最后贴张测试图,从左到右的三个ParticleSystem的属性都是相同的,差别仅在scalingMode上,第一个为Hierarchy,第二为Local,第三为Shape ~
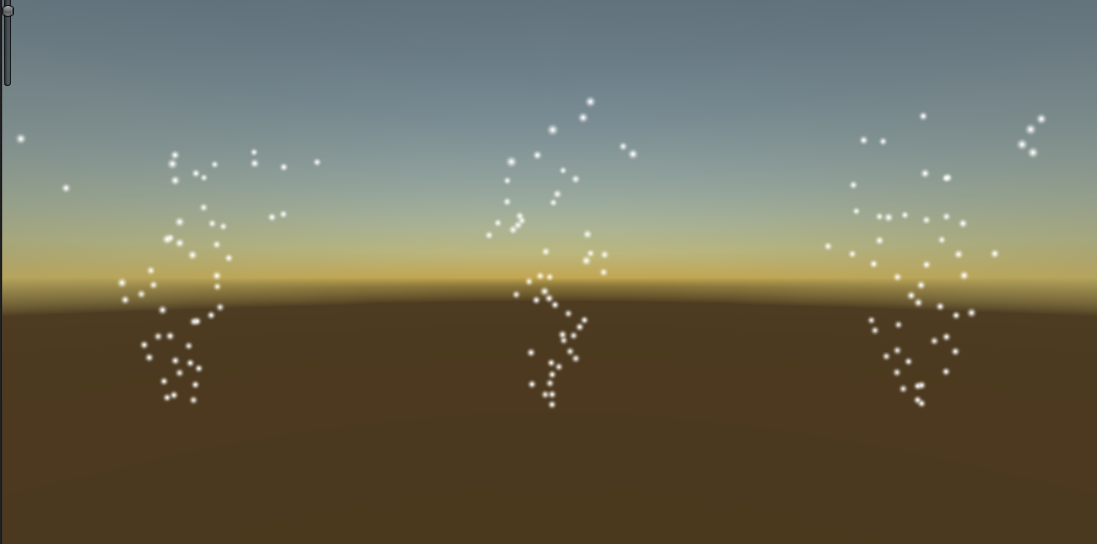
现在我们尝试缩放粒子,第一和第三都仅是调整Transform的Scale数值,第二个我们通过改变粒子属性值来进行缩放,结果如下:

可以看到,第一个粒子“完美”的被放大了,第三个粒子确实只有Emit的Shape被放大了,至于第二个粒子感觉可能有些奇怪,似乎是部分被放大的感觉,其实是因为我们使用了改变粒子属性的方法,遂而导致旧粒子不会受到缩放影响,于是产生了上述效果~
OK,粒子系统的“冷”知识大概就讲这么多吧,下次再见了~